Showing posts with label Suzanne Sergi. Show all posts

Wednesday, September 11, 2013

Lucky 14 Scrapbook Page with Family Stories


Happy Wednesday Friends! Today, I am sharing a scrapbook page of my daughter using the Family Stories collection. This collection is perfect in documenting the person you love. 


Here I decided to use to to showcase my daughter at the beach. Very versatile collection to be used for your significant other, or a special person in your life.


 Hope you receive a bit of inspiration to create your own scrapbook pages using Family Stories. It has become an all time favorite!

Wednesday, August 28, 2013

Halloween Canvas with Mini Flip Book by Suzanne Sergi


Happy Wednesday! Today, I am bringing you a new project featuring Masquerade Party. I love decorating for Halloween, and it is also a time where I enjoy creating a few altered projects to add my decor. This time I used a 10x10 canvas for the backdrop. I also pulled in some hardware from Tim Holtz to add a mini flip book right in the center. A few of your favorite Halloween snapshots, and you have spooky decor instantly!


To create this altered item, I used the Masquerade Party chipboard sheet, decorative brads, die cut accessory sheet, decorative border strips, and the file folders. A little ink, and fun spider from the craft store, helps to finish the canvas.


The first step is covering the sides and a bit of the front with black acrylic paint. I then distressed the edges of the canvas with a sanding block. You can also see at the top, and sides of the canvas I used a paint dauber to create random dots along the sides. Adds a bit of whimsical charm! I added the banner strips from the 12x12 Masquerade Accessory sheet to create an instant banner. I cut a few of them so they would not over lap too much with the ring binder clip. I also added some glitter paper underneath one of the banners, and embellished with mini bats. In the centers I pulled in tiny orange rhinestones. 


Here you can see the plastic spider with twine tied around its body. I also, hung a mini tag punched from the die cut accessory sheet. On the cover of the mini flip album I used the damask chipboard frame. I layered underneath a piece of embossed vellum. On the top of the vellum, is one of the cute paper bags, I used for my title. Around this mini bag, I used a large glittered moon, and chipboard witch to round the embellishing details.

Now, here is a peek at the inside pages. I used a mixture of patterned papers, vellum, mini treat bags and the file folders to create my pages. You can see one of the vellum treat bags being used as the background to adhere my photo of my three children. A simple sticker adds for a fun embellishment in the corner.

I created a die cut flower from one of the papers. Inside I embellished with a button sticker, and brad.

Another page featuring one of my favorite Halloween photos of my daughter. I create a spooky embellishment in the left hand corner of the page. I also spray misted the ledger paper for an even eerier effect. 


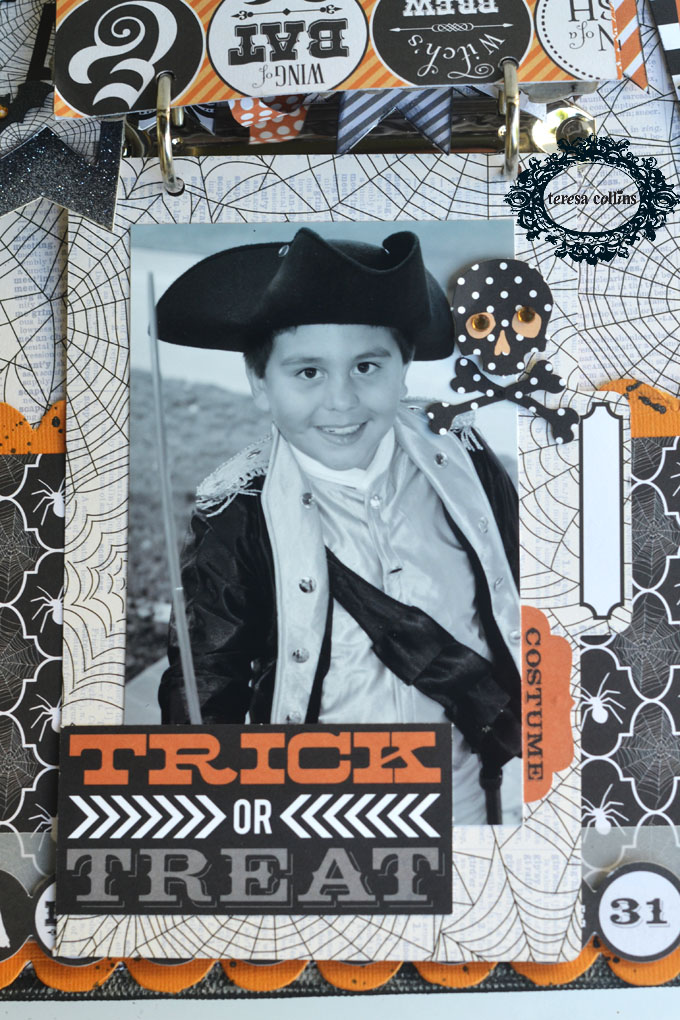
Here is one last page of my sweet son. Again using the die cut accessory sheet I used bits and pieces to add spooky charm to his page. This will definitely be a piece that will have your family, and friends talking about. What a perfect way to showcase your favorite Halloween memories during the spooky Halloween holiday! 

Wednesday, August 14, 2013

Shine On Memorabilia Layout by Suzanne Sergi


Happy Wednesday!  Suzanne here with a scrapbook page of my daughter Gabriela, using the new Summer CHA collection called Memorabilia. I love the chalkboard graphics found throughout this  collection. Perfect for more formal photos, and even the everyday photos, too. A very versatile collection for documenting everyone in your family.


On this page I used the Memorabilia die cuts to pull in one of the journal cards to add the quote from the Snippets 12x12. I layered the quote on the Frames blue damask paper, and embellished it with the chipboard star in the corner. Then used my favorite little enamel dots to add more texture. 

 Here I cut a large scallop from the Recorded 12x12 paper. I used the grey, and white side to add an extra pattern on my page. You probably have noticed I love utilizing many patterns onto my pages. On top I used the reverse side to punch two black flowers that I embossed. On top another layer of vellum, and used a memorabilia brad for the center.
I love using vellum on my pages, and projects! I love the extra soft layers it creates, and it is perfect for creating vellum pockets onto your pages. Here I cut two 2inch strips of vellum, and stitched along the sides, and bottom. I left the top of the pocket open, and tucked in these small wood stars inside. It added an extra dimension to my page, and thought it tied in the three chipboard stars found on the buttons package in this collection.

At the top of the page I cut bits from the Snippets 12x12 to add again more layers at the top of my page. These would also be perfect for stamping on top of, but since I am in the middle of unpacking, could not find my stamps at the moment! Hope to have all my supplies back in their spots by the weekend! So while I am organizing, I hope you have time for creating with Teresa's fabulous new collections!
 Thanks everyone for stopping by,today! I will be back soon to share holiday projects featuring Teresa's  holiday themed collections!

Friday, August 2, 2013

Santa's List by Suzanne Sergi

Happy Friday! It is the beginning of August, but that does not mean we cannot continue to share Christmas inspiration.  Today, I am sharing a scrapbook page of my daughter using Teresa's Collins new Summer CHA Collection called santa's list. I love the Christmas holiday, and this collection has a traditional feel from the papers to the gorgeous embellishments. There is sparkle added in as well, as you will also see a four color assortment of beautiful sequins.


On this page, I used a bit from each of the embellishments. You can see chipboard  elements, buttons, sequins, and border strips. I love this photo of my oldest daughter posing in front of the Christmas tree. Every year, the santa hats come out, as we begin to decorate our tree for the season. Hopefully, this is one tradition my kids will not outgrow. 


Here I created a cluster using journaling cards from the Notecards 12x12 paper, and cut a tag from the Snowflakes 12x12 paper. Simply, using the 3x3 cards, you create fast, and pretty layers. On top I used the large chipboard snowflake, and layered a vellum circle, with a chipboard button on top. In the center, I pulled a shiny sequin. I also wanted to pull in a bit of green so I punched a holly shape using green patterned paper from my stash. You can't have Christmas without a touch of green!


I love bold titles, and bold embellishments onto my pages. I turn to a tiny envelope found in this collection to tuck my journaling inside. However, I lined the inside of the envelope with the word pattern from the Red Flakes 12x12 paper. The mini envelope is  cute as is, but lining it with another pattern is a pretty decorative touch. I adhered the chipboard number 25 to the bottom of the envelope, and again embellished it with holly, and sequins. For another holiday touch, to the envelope, as who does not like to receive pretty packaging? I  created a ribbon bow, again using the Snowflakes 12x12, cutting a 1/2 inch strip to create my paper bow. Underneath, a scallop vellum was placed, and I finished the center with a chipboard button, and one last sequin.

Santa's list should be on your Christmas list! Perfect for a December Daily, and of course, documenting the magic of the Christmas holiday! Enjoy your weekend, and I hope you find some time to be creative!


Wednesday, July 3, 2013

Stationery Noted Cards with Suzanne Sergi


Happy Wednesday!

With Fourth of July arriving tomorrow I was inspired to pull out the Stationery Noted collection. Although the color palette is red, white, and blue, the cards below are fit for any occasion. I kept the design simple, and wanted to achieve clean lines throughout. I used white card stock as the base of each of the cards to keep them crisp, and clean.


On this card, I turned to the Stationery Noted Accessory sheet, and used one of the cards to house my sentiment. I wanted to create a card that could be used for birthday, or to include a congratulatory note. Stars are perfect for celebrating something big, so I used two of them on top of the card. I layered them at different angles on top of the card. Along the bottom you will see I turned to the border strips found in this collection. The design at the top was a rick rack design. I simply cut at the  tips to create my own unique border. I love to see layers on my paper crafts. So, here you will see bits from the accessory die cut sheet, and the 12x12 Polaroid paper. I also pulled a new punch, and punch the small rectangle out of red card stock. A few stitches hold this all in place.


Now, the border strips are also perfect for creating mini banners. Here I used a tiny section, and folded it over to attach to a toothpick. Easy to do, and was perfect for the last detail to the card.


On my second card I used the woodgrain paper found in the 6x6 designer pad. Then I pulled a banner found in the Summer Stories Accessory sheet. I used one of the stamps to add my sentiment inside the red label. Again, I turned to the border strips to create another tiny banner to tuck behind the paper flowers.


 To create this fun flower, I used two red polka dot flowers found in the flower assortment pack. I layered these on top of two stars I cut with my Silhouette out of two different patterns of paper. I wanted to create a big, and bold flower held together by a brad found in the Now & Then collection. I wanted one more element on this card, so I used a star charm found in the Every Day Moments collection, just because.

Hope this inspires you create cards using the Stationery Noted collection, but don't forget to pull in fun elements from all of your Teresa Collins  collections. They all work so well together! Happy Fourth of July!

Wednesday, June 12, 2013

Summer Stories Meet Project Life with Suzanne Sergi

Happy Wednesday!

If you have been scrapbooking for a few years, you have probably heard of Project Life. I have been wanting to try this new format in my own scrapbooking. However, all I kept doing was thinking about, and not really having a plan to get started. I decided to begin my 2013 Project Life Album at the beginning of June. I had great intention of designing my cover page, prior to the 1st of June. However, June 1st came, and went. So, this week, I decided to bring out two page protectors, pair it with the gorgeous collection of Summer Stories, and begin documenting the new chapter in my family's life.

The past week was a perfect opportunity to document, and  it was a week of celebration. With a bit of renewal, thrown in for myself. My approach is simple, and simply chose the photos that were of the most significance of the week's events. My oldest daughter graduated from Junior High, so I included lots of photos from this event. I also documented a personal first moment for me.

Luckily, for me I had these page protectors in my stash. My process was simple, as I have been documenting each day with a photo. I also have been jotting down notes of the day's events in my calendar. I tend to forget what happened yesterday! 

Here are a few details of my week in review:


One thing I love are the assorted envelopes found in Teresa Collin's collections. Here I simply adhered to the outside of the page protector. The envelopes are perfect for including journaling or memorabilia. I covered the inside flap with another patterned paper. I pulled out some of Teresa's metal hardware to add more texture to this pocket. I love dimension on my projects, and although, Project Life has a more simplistic approach, there is not any reason to add your own creative touches! In this decorative envelope, I added movie ticket stubs. This was a simple moment, but one worth remembering! I pulled in some twine, and chipboard  elements from Summer Stories on the top.


Here is a pocket that I chose not to tuck in a photo. I decided to simply embellish it, using the large chipboard element frame. I also pulled in the 6x6 Summer Stories designer pad, and cut the mini story bingo card, to place inside the frame's window. It fit perfectly! 


You can also add detail to the outside of the page protectors by using the border strips found in this collection, too. They are 12x12, and add a nice decorative border underneath the photos.


 Here is a closer view of the 4x6 pocket on the right hand side of the page. I added patterned paper to the bottom of the text background. Created a pocket, that I stitched with my sewing machine. I tucked in another photo of my special graduate. I added one of Teresa's pre made flowers, and a decorative brad for the center.

Above you can see a snapshot of our week, and love that the 4x3 journal cards were a perfect fit to add into the page protectors. I used them primarily because I love the quotes found throughout this collection, and they are perfect to include journaling tidbits of the week.


A final detail of a photo of the special graduation blessing read by me to my daughter.  I rarely have photos of myself, so nice to see at least one snapshot of me. I am beginning my new chapter, and I cannot wait to use Project Life, and Teresa Collins collections to help me document them in the weeks ahead!

Thanks for stopping by the blog, and have a fabulous week!


Wednesday, May 22, 2013

Shadow box by Suzanne Sergi using Stationery Noted


Happy Wednesday! Suzanne here with a shadowbox frame featuring Stationery Noted. This is one of my favorite collections. From the quotes, to the chipboard elements, and to the paper flowers, this is perfect for the everyday. 

I have had this shadowbox in my stash for awhile, and thought it was perfect for creating an inspiration home decor item. I first painted the shadowbox with white acrylic paint, and then began building the individual windows. I started with selecting my favorite quote on the Quotes 12x12. I covered it with diamond dust, as I always love a touch of glitter! Then I decided what papers to use for the inside of the windows. Primarily, I pulled from the Polaroid 12x12 paper to use for the openings. Off to the left I used part of the Ledgers 12x12 to completely cover the right hand side windows.


Here you can see I used some of the paper flowers from the collection. I embellished the center with a damask that was found on one of the quotes. I simply punched it using a scallop punch, and covered it in glitter.  I also stamped the middle of the canvas butterfly using an older Teresa Collins stamp set. Covered the center of the butterfly with a chipboard element from the Stationery Noted. I added a bit more of detail using a small tag, and metal clip.


Detail of the the two bottom windows, using the Stationery Noted 12x12 Accessory sheet, and a brad found in the Far & Away collection.

I stamped the word par avion using the Stationery Noted stamp set underneath the owl.  I added more Teresa Collins bling, and a chipboard button for the center. Off to the right,  I cut apart a quote found on a small ticket, and embellished above with a punched butterfly. I added a bit of ribbon to the top of the paper. 

One last detail of the windows. I really love all the bits, and pieces found throughout this shadowbox. An item that will serve as inspiration for yourself, or someone special to you! Thanks for stopping by, and see you back here tomorrow!


Wednesday, May 1, 2013

Summer Stories Cards with Suzanne Sergi


Happy Wednesday! Suzanne here featuring once again Summer Stories collection. I love the clean lines, and patterns found on the papers. The embellishments are also perfect for adding elegant details .
Today, I created two cards showcasing some of the elegant papers. On the following card I layered two of the papers on top of one another, along with a layer of vellum. This card design would be lovely for recognizing the special Mom in your life.


I did use the beautiful grey wood grain paper as the base of the card. I utilized the chipboard words from the 12x12 chipboard element sheet for my sentiments. A few scattered enamel dots add a bit more interest, along with the embossed vellum flowers.

On the second card I embossed white cardstock for the base. Simply used the gorgeous gold embossed polka dot on the majority of the card.


I used the chipboard frame at the top as the base for my main embellishment. Added a pretty bloom, and more of the gold polka for paper for the center.


I tied string around the chipboard frame , and hung the small circle cutout as a sweet tag. Again, using the 12x12 diecut elements sheet, I used the word cherish to layer across the flowers.

Hope you enjoyed these two quick cards, and hope you have a chance to play with this collection soon.

Wednesday, April 17, 2013

NEW Summer Stories two page layout by Suzanne Sergi


Hi, Suzanne here with a two page layout featuring Teresa's new line, Summer Stories. I will admit, I do not create two page layouts very often, unless it is event specific. I feel that sometimes one photos is all you need to tell the story. Luckily, for me I have hundreds of photos of this mini photo shoot of my little girl Macie. Summer stories has a gorgeous palette of pink, blues, greys, and black throughout. I was inspired by the new release to revisit these photos. Reminds me of how fast she is growing, and I simply want to hold on to every minute with her!

Now, you may notice a trend on my scrapbook pages, that I do tend to use typically a 5x7 photo. With a two page layout , I was able to expand this size to an 8x10. With a smile like hers, it is a memory worth remembering. So on the right of the page, I chose my main photo of my little girl. To keep my design simple, and cohesive,  I used the same pattern paper for my base. The one used was Flashcards. I loved the big Alphabet pattern, perfect for documenting children photos.


I did pull in a stamp from Stationery Noted to stamp on top of the journal card above. I love tucking in a variety of layers underneath the top of my photos. So, I pulled in the pretty grey damask from the Summer Stories 6x6 designer pack. Tied some twine to add a bit more interest. I pulled out my Slihouette Cameo to diecut the circles tab you see, and embellished a couple of the circle with the Summer Stories enamel dots.


Again,  I put my Silhouette Cameo to work, to diecut the YOU title. I punched flowers again from the Summer Stories 6x6 Designer Pad to embellished the page. When I am working on girly pages, very seldom will they be without a flower, or two. The camera brad is also from this same collection.


 Again, I love having embellishments in sets of threes, so another flower layered on top of embossed vellum adds more detail to my page.


 I did use this premade title from the collection. To add more texture, I stitched around it, and layered it on top of the polka dot paper,  cut into a banner. Underneath the chipboard arrow is from the Summer Stores 12x12 Chipboard Element Sheet. Love enamel dots, and they were perfect for adding quick details to the arrow.


Here I layered the flower on top of a chipboard frame. You will find this frame in the He Said, She Said collection. Inside I filled it with funky black pattern to balance the left hand side of the page.

I love using a variety of pattern papers onto my pages, and a two page layout gives you enough space to do just that!

Thanks for stopping by, and I hope you have been able to find this new collection! It is absolutely gorgeous, and perfect for Mother's Day projects!


Related Posts Plugin for WordPress, Blogger...