
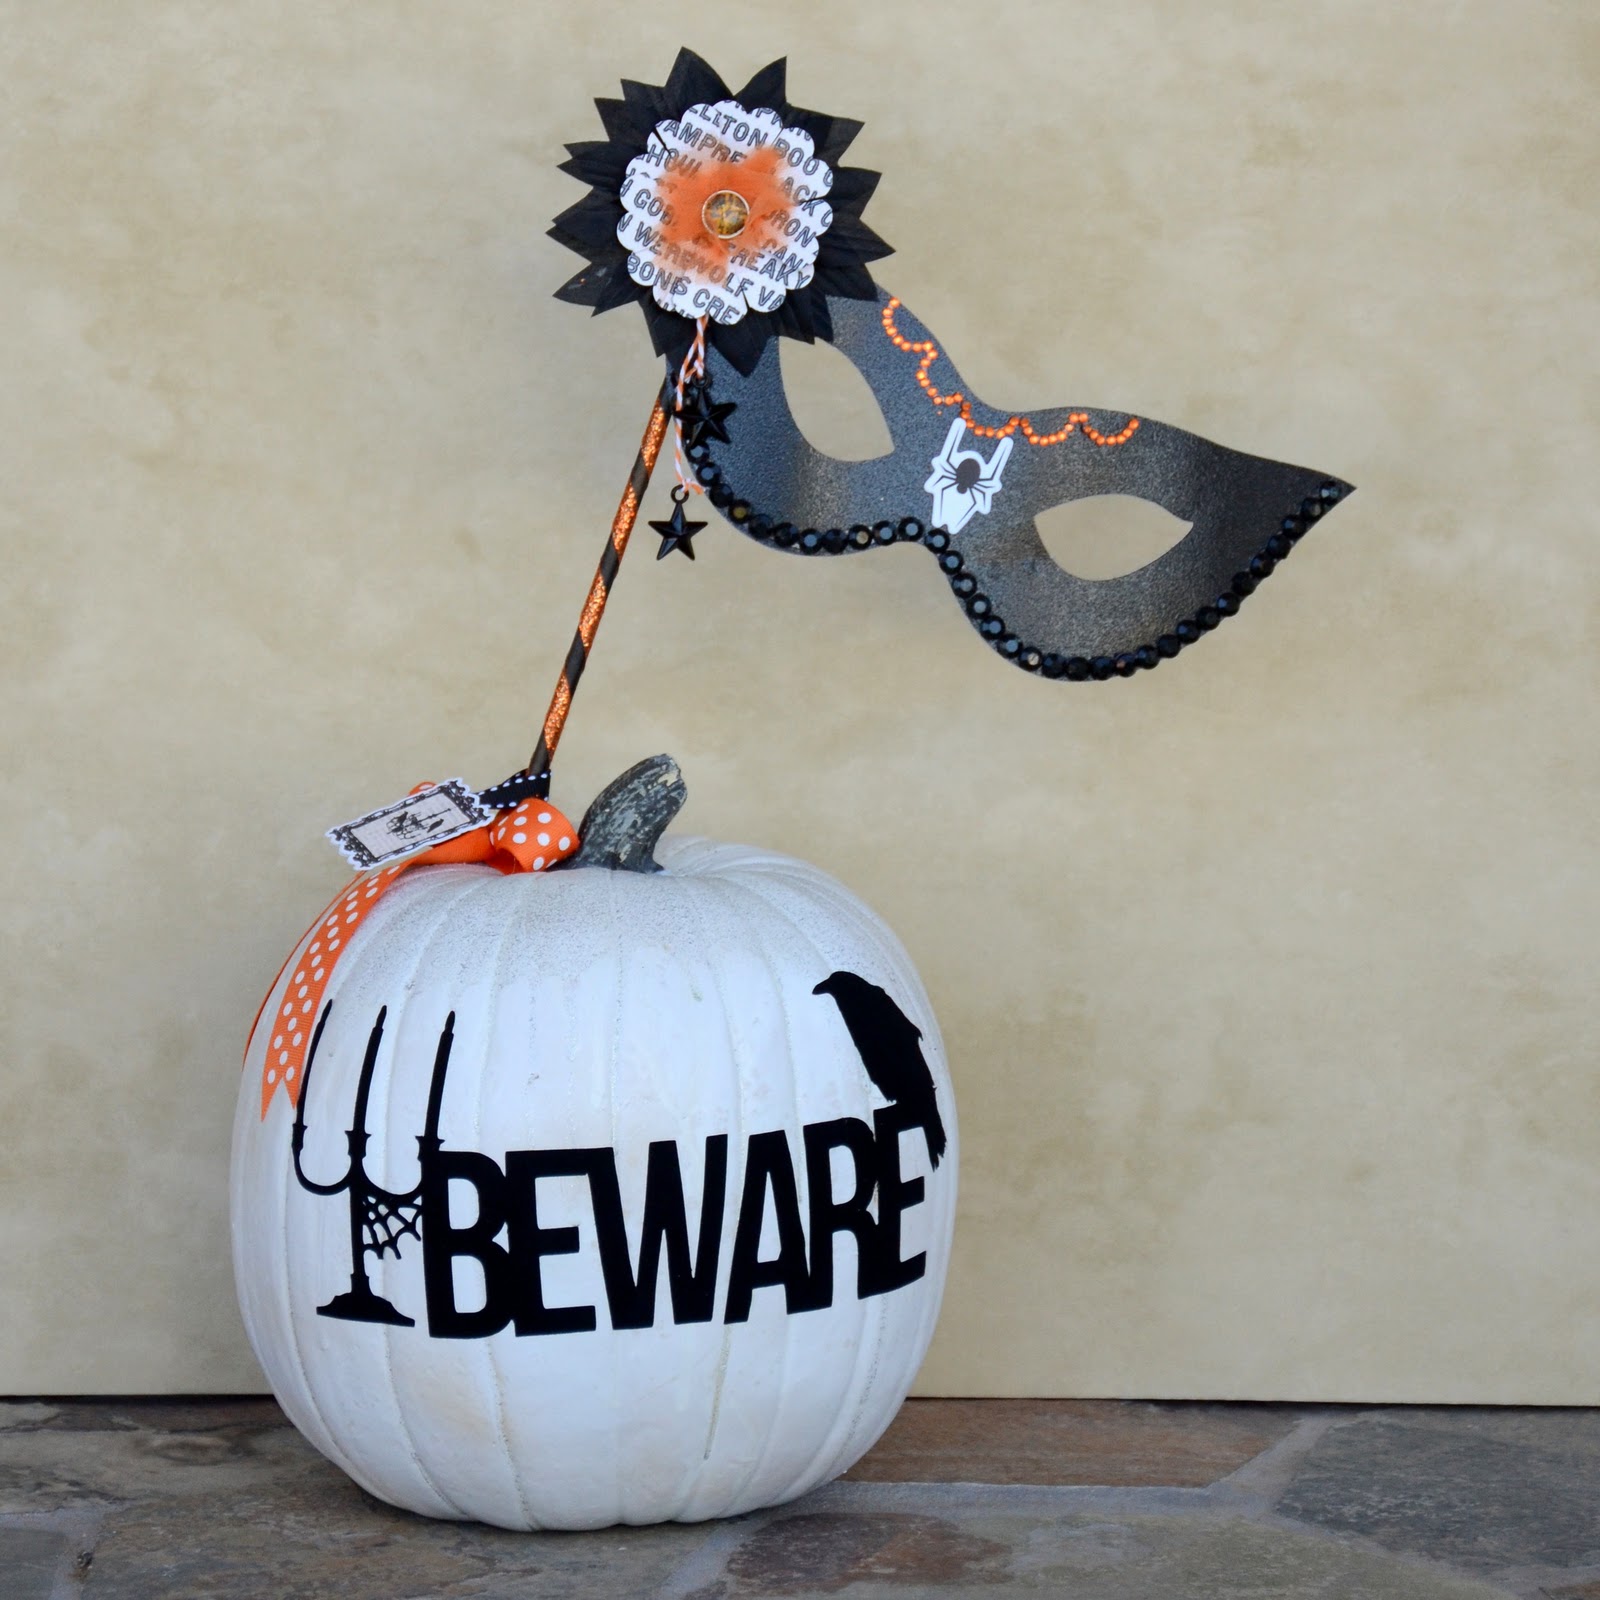
I love all the Seasonal Decorating - and thought for sure I needed a new Halloween Centerpiece this year, so it was time to come up with something fun using Teresa's Haunted Hallows line. I also incorporated the brand new Cricut "Chic and Scary" cartridge that Teresa designed. I had ton's of fun decorating this pumpkin and hope you enjoy seeing the process.
Designed by Colette Nederhoff
http://nederhoffco.blogspot.com
Supplies:
Plastic carvable pumpkin: Hobby Lobby
Flat White Krylon Spray Paint
Silver glitter spray paint: Hobby Lobby
Black Flocked Vinyl wall decor paper: Hobby Lobby
Cricut Expression machine
Teresa Collins Cricut "Chic and Scary" cartridge
Teresa Collins Black Glitter Paper (World traveler)
Teresa Collins Blingage: Donna's gems & Shelley's stars, Brooke's flower
Haunted Hallows Spiderweb paper
Haunted Hallows Decorative Brads, Trims, Chipboard elements, and Stickers
Orange Polka Dot ribbon. Orange sparkle ribbon, and black stitched ribbon: Hobby Lobby
1/4 inch wooden dowel -- 14 " long
Black spray paint
Hot glue
3 inch scallop Circle Punch
Here's how this fun centerpiece was created:
Using the "Chic and Scary" cartridge, cut out a Mask from the glitter paper. It measures: 4" tall x 10" wide.
Set aside.
Using the Black Flocked Vinyl,

Set these aside also.
Next, I covered the Stem of the pumpkin with tape before spraying the pumpkin white. It was actually Ivory- but I wanted it white. On the top edge, I sprayed the silver glitter and sprayed it heavy so some would run down the pumpkin. It gave it a cool look.

After the paint dried, I applied the flocked vinyl candelabra and word across the front of the pumpkin.
The next step was to create the decorative Mask. The Donna's black gems look awesome along the bottom edge. MY mask did require me using 2 of the gem strips. One full one and one partial. In my opinion, no one can ever have enough gems!! I also added the orange rhinestones to the top center of the mask.
A cute spider chipboard ended up in the very center at the nosepiece.
This mask is mounted on a dowel that I first sprayed black and then wrapped with orange glitter ribbon.

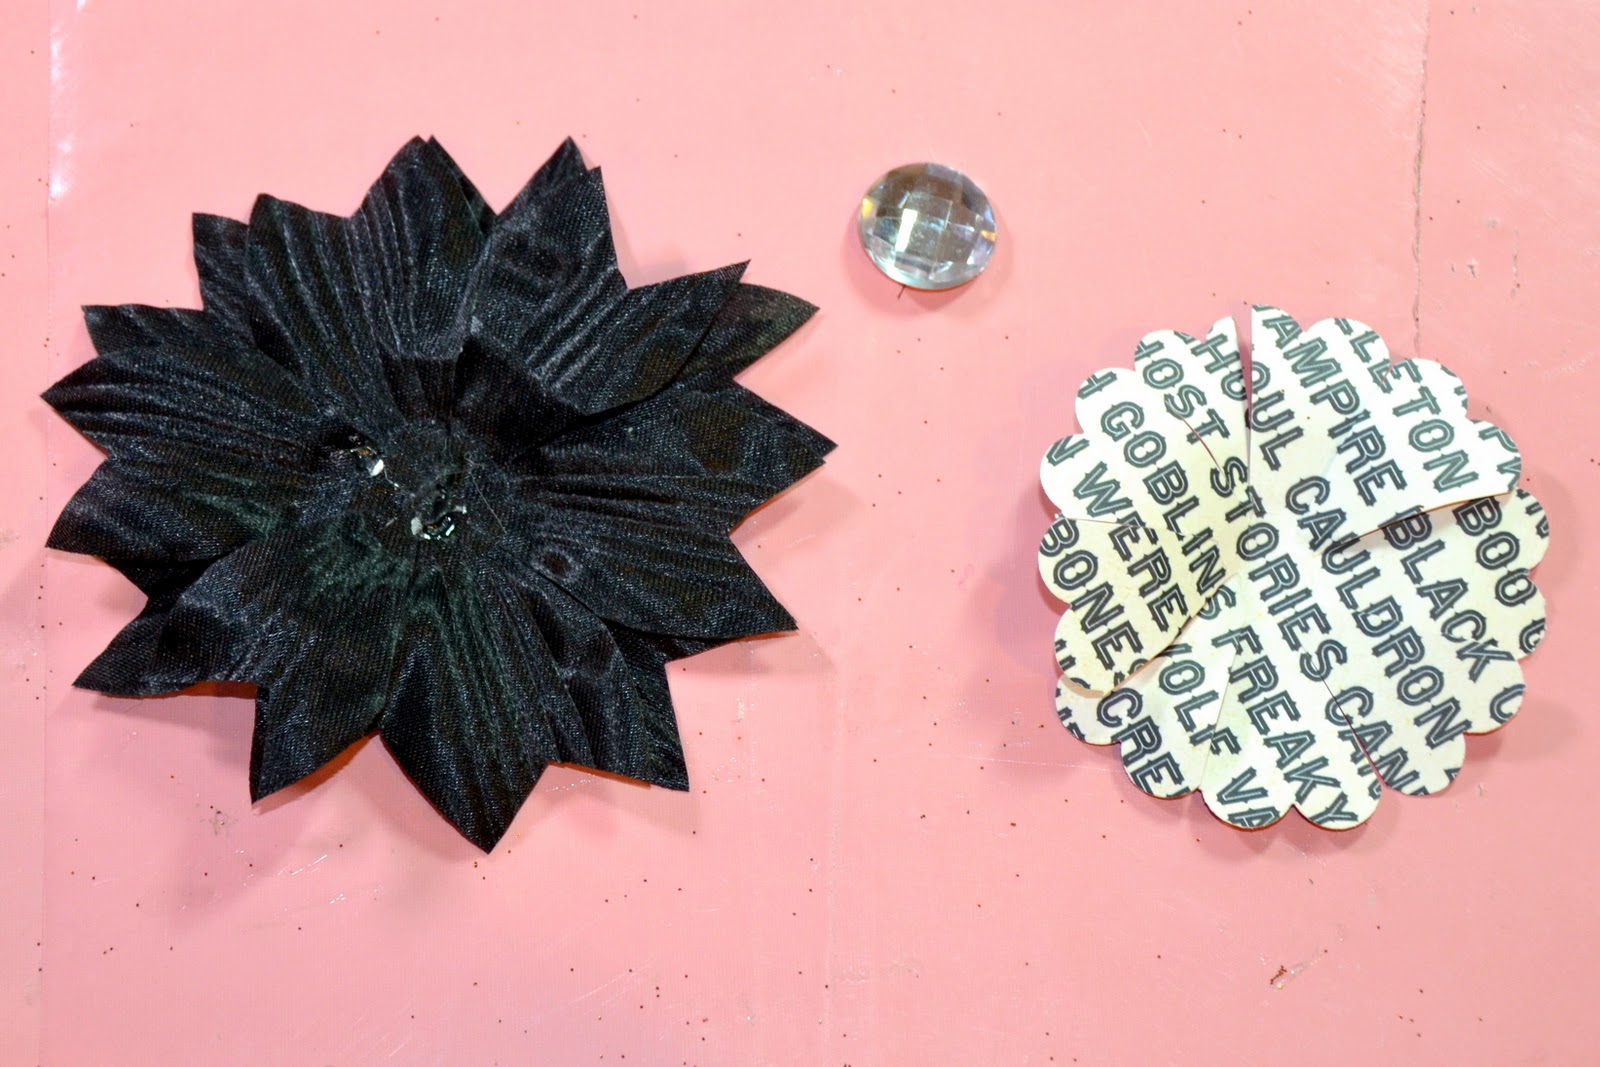
Next, I wanted to accent the end of the mask that was attached to the stick with a flower. I love the Teresa Collins Brooke's black flower, but it actually ended up being a little bit big. I decided to make slightly smaller by cutting the petals down a bit and cutting them into a "V". You can remove the center bling, and then overlapping a few petals at a time, cut a "V" in them until they are all done. To make a different Center, I punched a 3 inch scallop circle from the Spiderweb paper. The black and white side with words made a cute center. By clipping "Petals" from the scallop circle- by making slits from the outside to the center, you can make a dimensional flower center. The photo shows how I bent the petals a bit to shape this. In the center, I added a little Bunch of the tulle trim, and a decorative brad center.
Lastly, stick the dowel down into the pumpkin and when you decide how tall you like it, glue it in place with Hot glue. I tied the polka dot bow around the
bottom of the stick to cover my glue. Cut a piece of the black ribbon to 4 inches. I folded the ribbon in half and wrapped it around the stick. To make a tag, stick a bird chandelier sticker over the ends of the ribbon and then you can cut a small piece of cardstock to line the back of this tag.
Now I have a wonderful Halloween centerpiece!!! ENJOY

WOW! I LOVE IT! What a fantastic idea! I can see me getting creative today! :-) Thanks for the inspiration x
ReplyDeleteGORGEOUS!
ReplyDelete