This is the front of the journal. It's made out of a Teresa Collins binder. I left it white, and I'm a simple kind of guy, so I left the front of it pretty simple.
This is the first page. The top half has 2 pockets with mats in the pockets. I have learned that to make a successful journal, and if I need it to look full, I cut my scraps into mats, use the corner rounder, add some stickers, or embellishments, and there you go...you have photo mats, to put all your extra pictures on. This way I get to use lots of pictures for my product.
The bottom half folds out, like I've done in other journals. I really love this simple technique. Again, its a simple technique, but it lets you get lots of photos.
This is the back page of that first page. The top has a simple pocket with more photo mats, the bottom has a pocket that pulls out.
This is the tag that is in the bottom page. Again, look how simple this is, cut a rectangle the size of your pocket, round the corners, add a sticker at the top.
These are two more photo mats that I made to stick in the pockets. Simple.
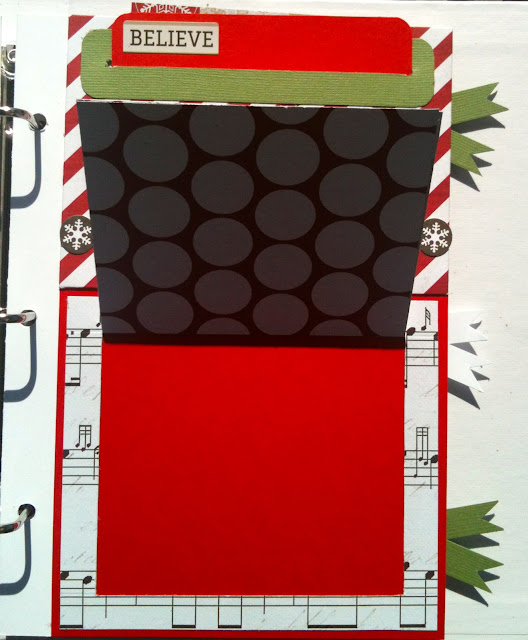
This is the next page, this actually has two different things. The top has a piece of paper that slides up. In addition, there are two flaps. One that is on the top, and one that is on the bottom. They both flap to the left.
This is the mat that you pull up. It's held in the pocket by being sandwiched between the front and the back page. I love this technique.
This is the back side of page 2. It has a pocket to the left, and the flap also folds up. (You open where the "memories" chipboard sticker is)
This is the pull out from the pocket on the left.
This is the flap lifted up.
This is page #3. The top has another mat that is sandwiched between the pages, and the bottom half folds up.
Here is is with the flap folded up.
Here is the mat pulled out from the inside pocket.
Back side of page three. If you look at it, all this is 2 little pockets, nested on top of each other, with another one of those mailbox slides.
This is the last page. It's three pockets. That's it.
Now that you look at the journal, you will notice that I've got a few simple things, and then all I do is repeat them over and over throughout the journal.
The journal has actually 24 little spots that you can put 24 pictures, or 24 thoughts, or what not. I originally planned it so it would go along with the advent numbers in the Christmas line. However, I messed up, and ended up using that sheet of paper. Whoops! Oh well..I like it anyway.
Hope you enjoyed that tutorial on how to make the interactive journal.
Happy Crafting.
Brett Lund
1craftyguy.com


Beautiful album and great ideas. I can't wait to go home and pull out my holiday papers.
ReplyDelete