"You and Me Board Book"
Designed by: Brett Lund
Featuring: Teresa Collins Designs Summer Stories
Supplies:
Summer Stories 12x12 sheets
Summer Stories Enamel Dots
Summer Stories Die Cut Sheet
Summer Stories Buttons
Summer Stories Tape
6x6 paper pad
Pop Dots
Glitter Paper
Corner Chomper round edge punch
Cinch Machine
1.2:" binding wire
Hello Crafters! This is Brett Lund, and I have got a really fun album that I would like to share with you. If you have a love of books, watch out...this is not for the faint of heart.
To make the base of the book. You will need these:
I went to my local thrift store, and purchased some children's board books in various sizes. You want to get ones that are still in good condition.
Once you get them home, I will open them up, and with an X acto knife, you will first cut the spine.
Now that you have cut the spine, then cut out one of the pages. If you need to cut off some of the end from the spine, to make it more crisp, and not have tape or glue residue on it, this is when I will cut it off.
Once that is completed, you've got a few options to alter your pages. 1. You can sand them down and apply Gesso to paint over the surface. I find with Teresa Collins paper, because it's thick, you really don't have images going through the paper. 2. You can use Modge Podge and attach the paper to the books. 3. You can use your ATG gun and adhere the paper to the book. (This is actually my favorite method. It's less messy, and you don't have the paper warping all over the book)
I find that it's much easier to take the book, and apply glue to the outside edge, and to the middle of the page.
Then I take the book page and stick it onto a piece of scrapbook paper. I then take an X Acto knife and cut around the edge. Then I repeat the process with the other side. Once both sides are cut out, I take the Corner Chomper, and cut the edges, to make them round.
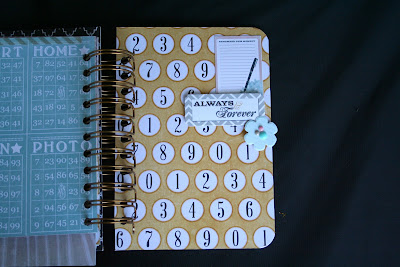
Then I take all my pages, and stack them up, and then I punch holes in them, and bind them with the 1.25" binding coil. That's it! My book is assembled, ready to embellish, and give away.
You will notice in the book, there are flowers. I love flowers, and there weren't any in this collection, so I punched out some with some dies, and made my own.
I like to add layers to my pages. I love to use pop dots. They really pop things out.
Remember, when you use die cuts, it's ok to bend and shape them. This gives them more dimension, and makes them stick out of the page.
Can I tell you, I am so in love with the fonts that were used in this line. Wow! Simply amazing!
Here I am using multiple layers, sandwiching them in between pop dots, it makes this flower really pop.
In this example, I used the mini 6x6 polaroid sheet and cut them out. Then I matted them on top of a gold glittered paper, and then glued this onto my page. Love how this simple element turns out.
This is the embellishment up close.
This is the last page. Once again, I love how the pages, elements, colors...everything works out.
There you go! Super easy book. Go buy some children's books, take out your aggression on them, and create some amazing works of art. Happy Crafting!
Brett Lund
www.1craftyguy.com


great idea Brett! :)
ReplyDeleteI love this idea. I did this with my kids books too. I am so happy you showcased this!!!! Great project!
ReplyDeleteI will try this to give as a gift. Thanks for sharing.
ReplyDelete